Outlook 2010
- Open Microsoft Outlook 2010.
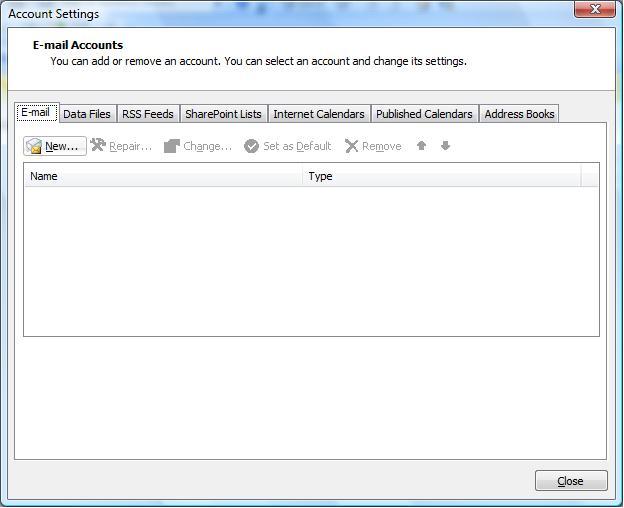
- Select File > Info > Account Settings
- Select the email accounts tab if it is not already selected
- Press "New"
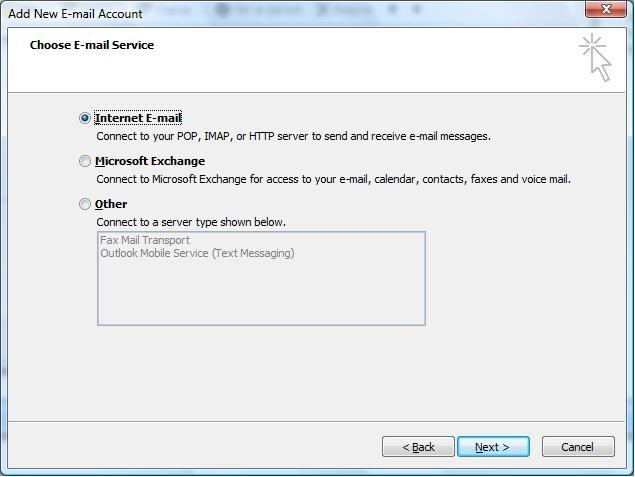
- Check the "Manually configure server settings or additional server types" box
- Choose Internet Email
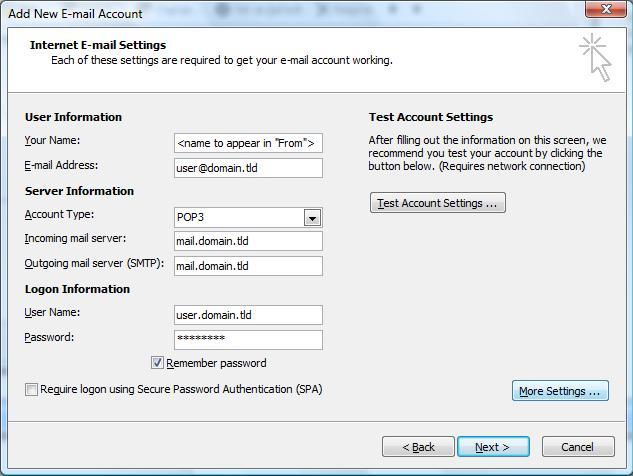
- In the Internet Email settings window input the following data
- Your Name:
- Your name (will appear in the From field)
- Email Address:
- Full email address
- Account Type:
- POP3
- Incoming mail server:
- Your name (will appear in the From field)
- Outgoing mail server:
- Your ISP's outgoing server e.g - mail.bigpond.com or mail.optusnet.com.au, to help find yours a full list can be found here: http://support.stayingintouch.com.au/list-of-common-isp-outgoing-mail-smtp-servers/
- Username:
- Your full email address
- Password:
- The password you were sent in your setup email, tick remember password
- Click Next and then Finish
-
Step 1
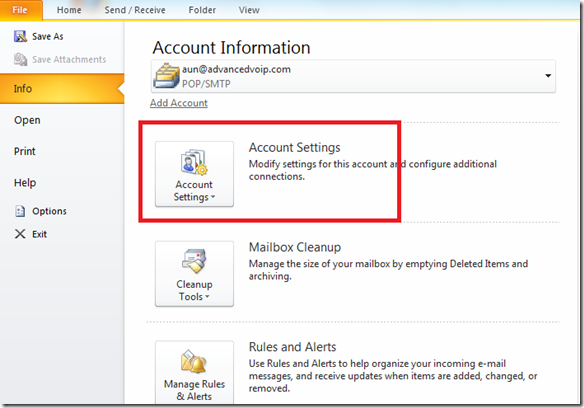
Use the Start menu to start Outlook. When it opens, click the File tab and select the account for your e-mail address if it’s not already chosen:

-
Step 2
After making sure your e-mail address is selected, click the Account Settings button to open the settings window:

-
Step 3
Make sure your e-mail address is selected, then click Change.

-
Step 4
Click the More Settings button:

-
Step 5
Choose the Advanced tab. In the “Advanced” tab, make sure that Leave a copy of messages on the server is checked. Then change the “14” to the number of days you want to leave messages on our servers:

-
Step 6
After you close the “Internet E-mail Settings” window, the “Change Account” screen will still be visible.
-
Step 7
Click Next. Outlook will test the settings, then should tell you that “all tests completed successfully”:

If Outlook tells you a test failed, double-check to be sure you’ve entered the settings correctly. If the “Test Account Settings” window is still open, close it to continue.